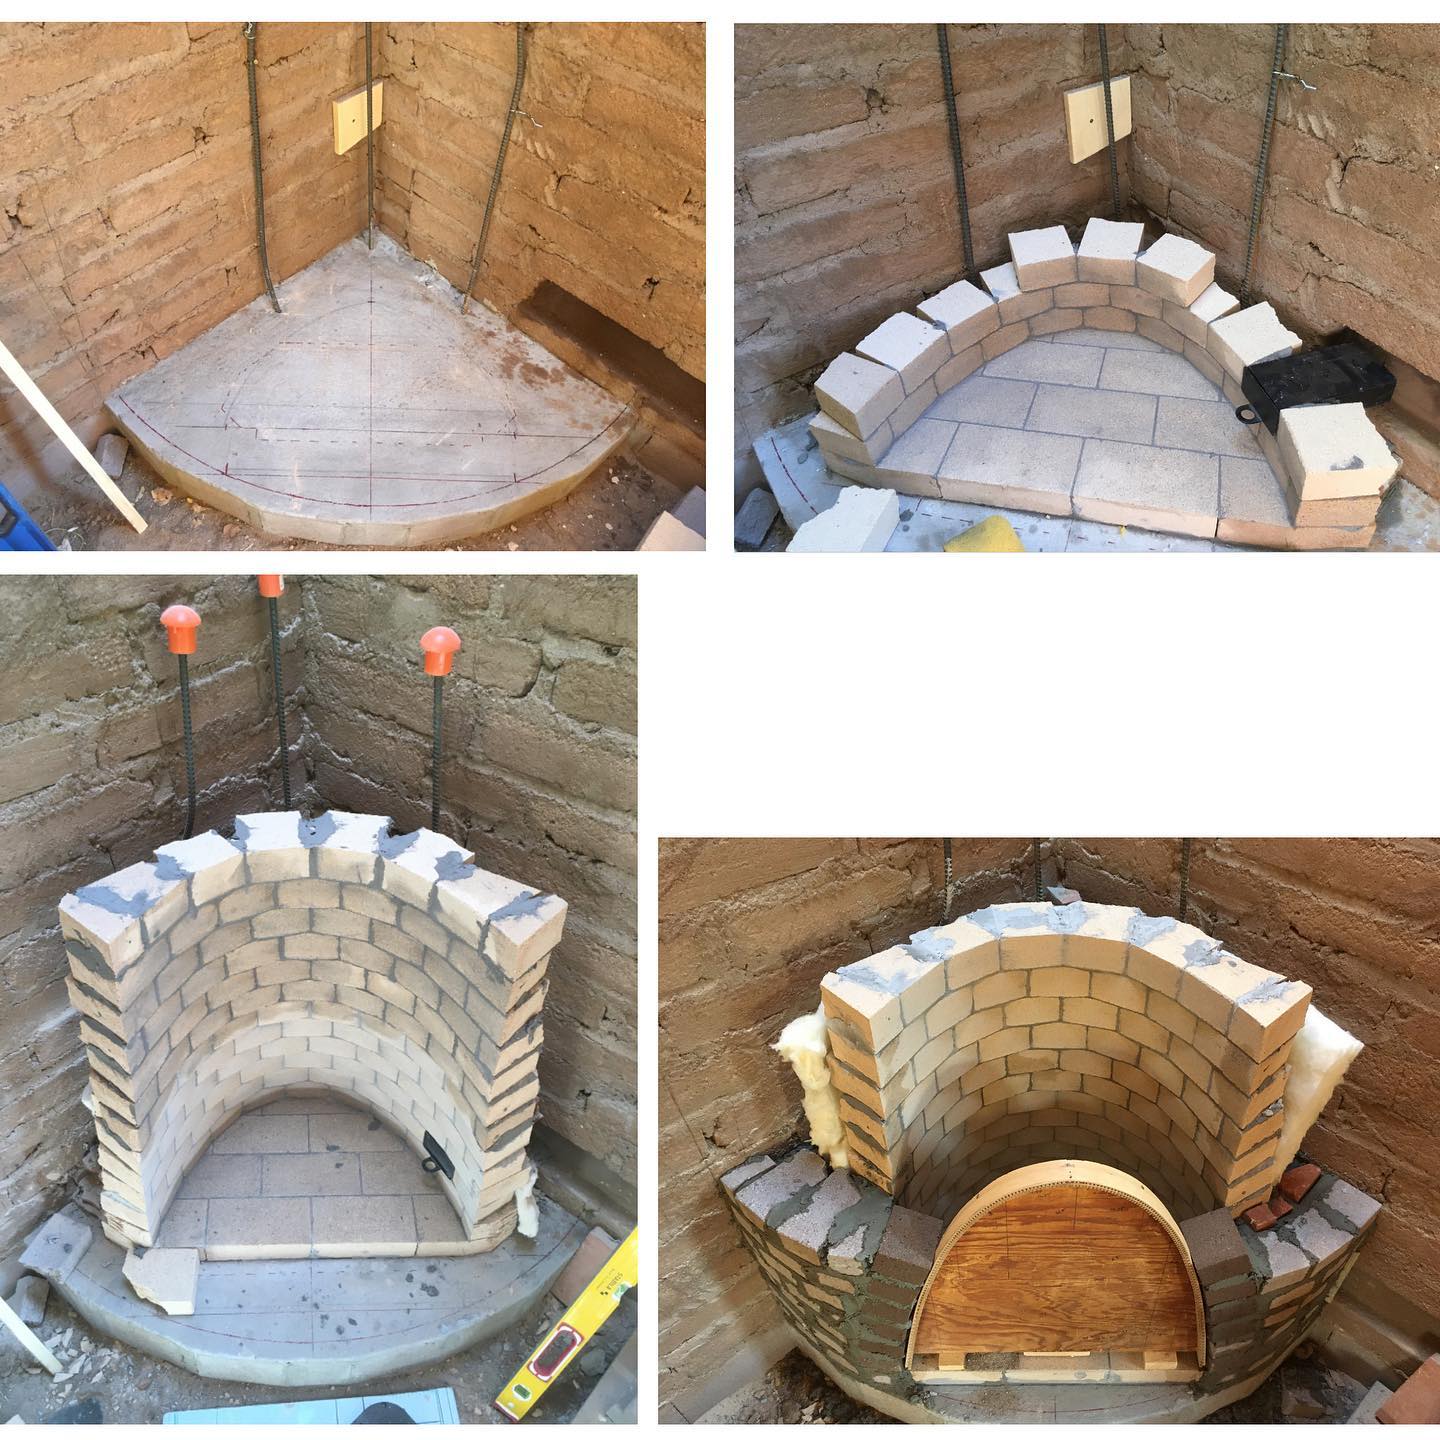
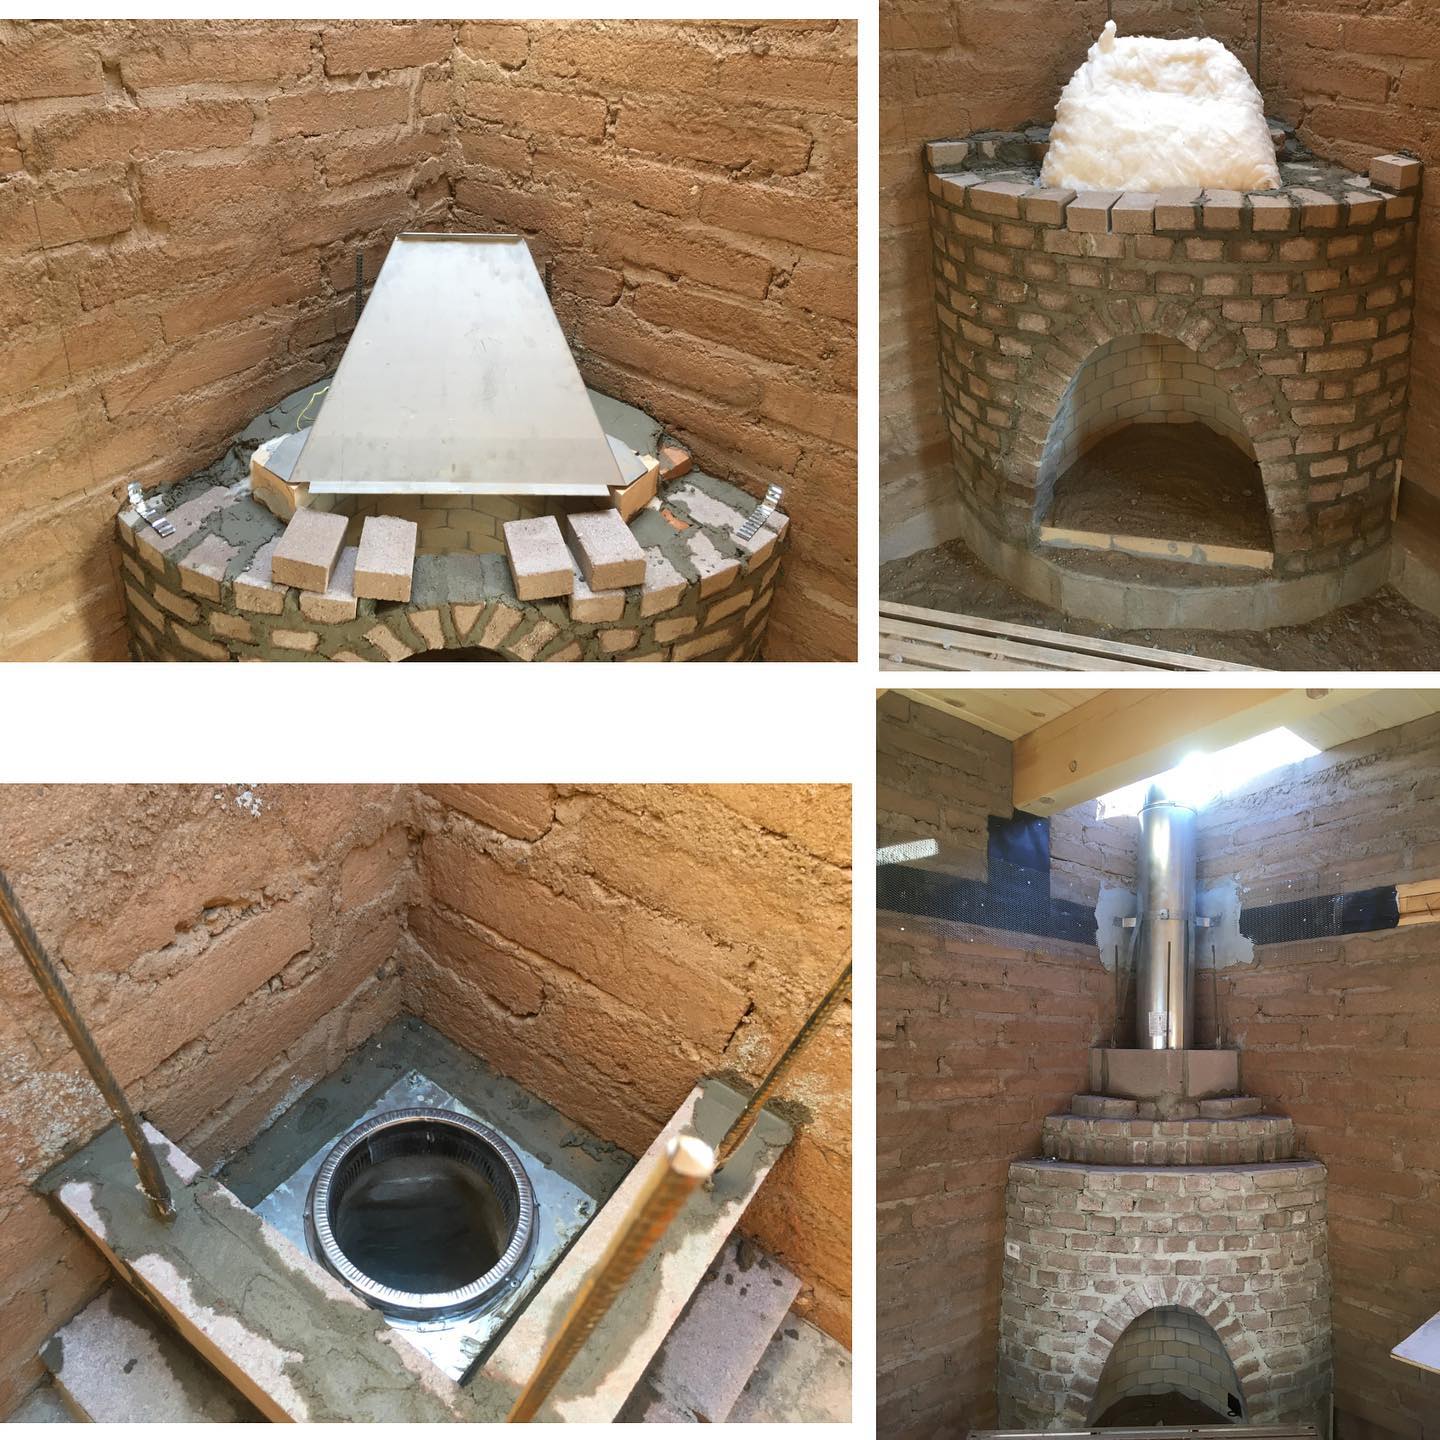
We’re a little overdue for an update! A lot of work has been happening on the house, inside and out, so we’ll split this up between two posts. Inside, Kenny’s finished the masonry work on the fireplace. There’s a lot to consider with a kiva fireplace. What shape makes sense, how big does it need to be? We were inspired by the small, squarish corner fireplaces you see in older homes in New Mexico, and tried to keep ours as compact as we could. Because we have a wood bond beam, the chimney required some clearance from the corner. We originally planned on using clay flue liners and a full masonry chimney, but opted for an insulated metal chimney pipe, which let the chimney be further back in the corner. Being an insulated chimney, it should also hold higher flue temperatures for longer, which means less potential for creosote to build up and better drafting. For a round flue, the area of the flue needs to be at least 1/8 the area of the fireplace opening. (For rectangular flues, the rule of thumb is 1/10). The shape of the fireplace opening was something that we could play around with, so long as that ratio worked with our 8″ flue pipe. We went with a catenary curve for the shape (the St. Louis Gateway Arch is a famous catenary arch). The city building department required us to add a combustion air supply inside the fire box. A channel was cut in the adobe for this purpose. With a kiva fireplace, the shape is like a beehive. Each course of bricks batters back about 3/16″. The high-form damper leads to the smoke chamber (essentially, the brick equivalent of a pipe reducer), creating a smooth, gradual transition for the smoke to travel. The smoke chamber here is trapezoidal to accommodate our more compact design. Later on the fireplace will get lathed and covered with 2 coats of gypsum plaster. If we want it to have a smooth texture, we’ll go with a gypsum plaster finish. Or we might finish it off with adobe mud to give it the same texture as the walls.
Nov 24, 2021