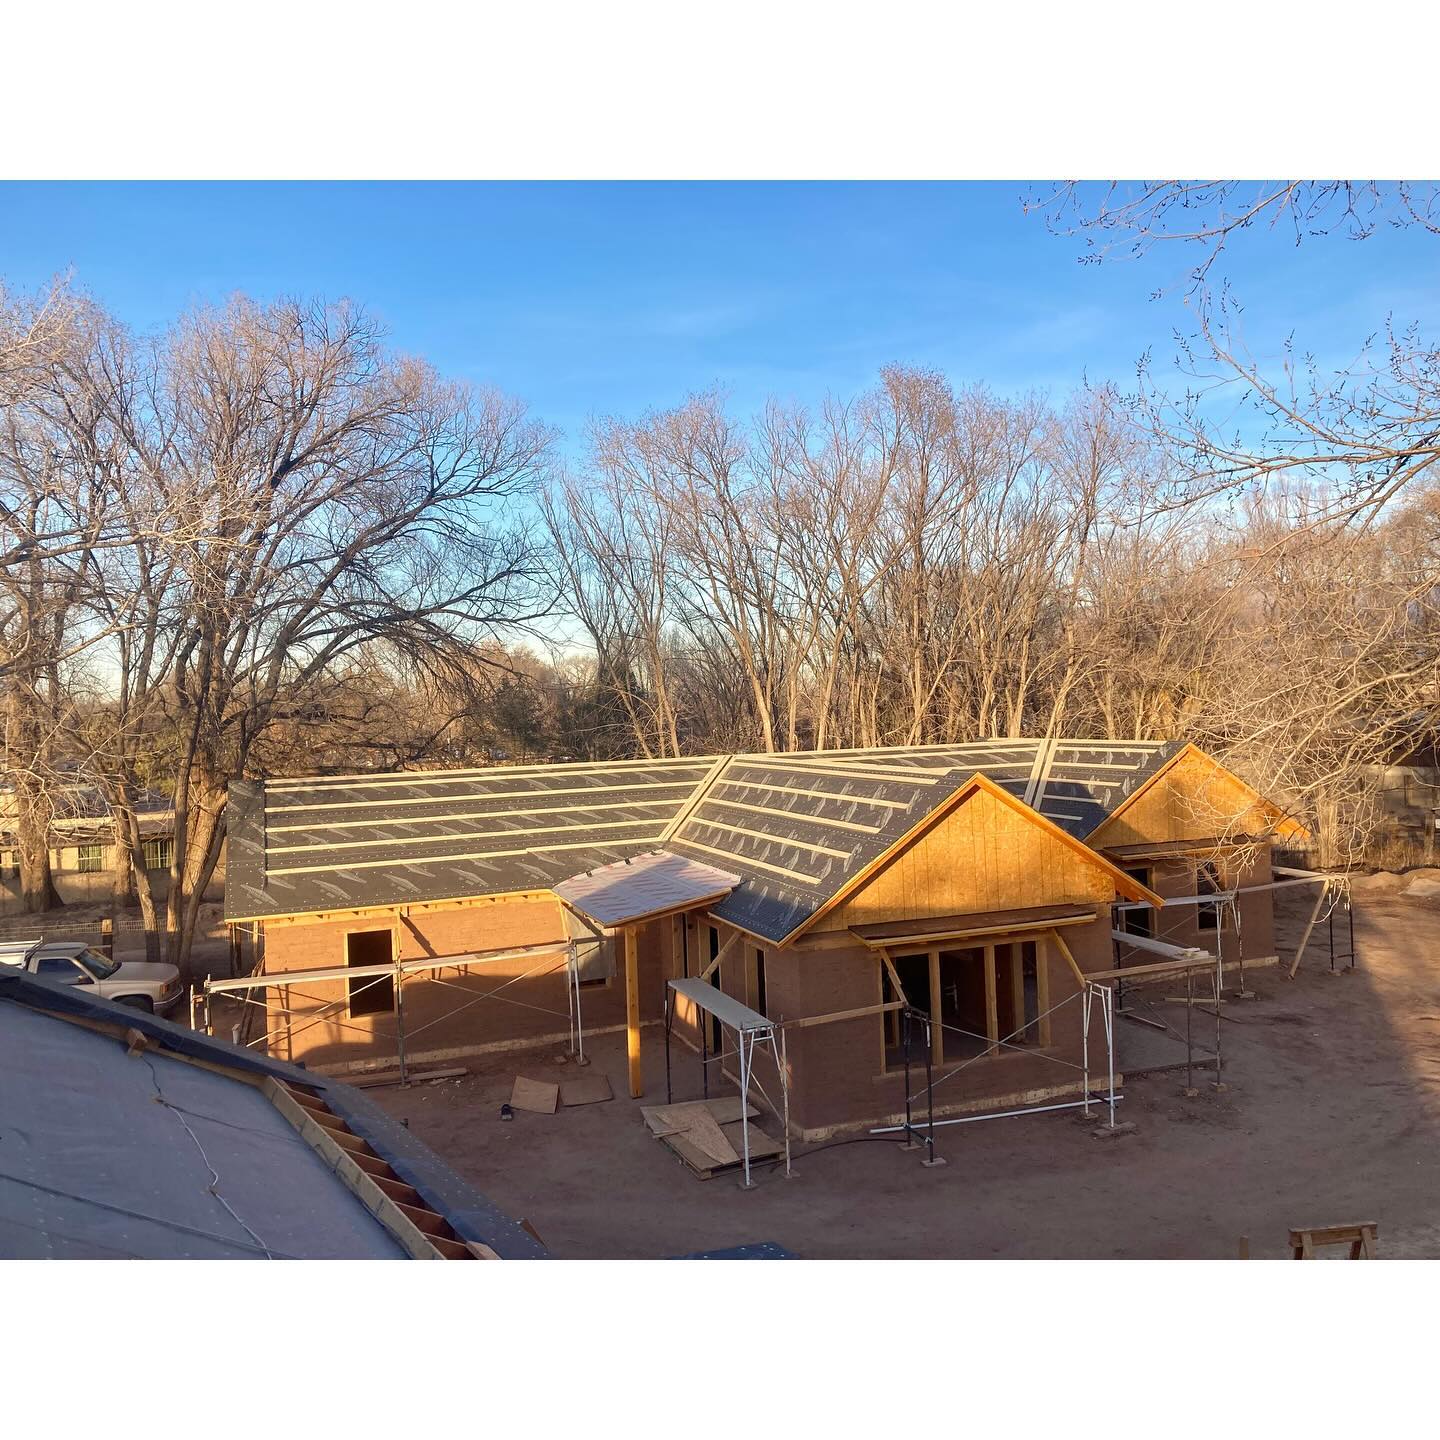
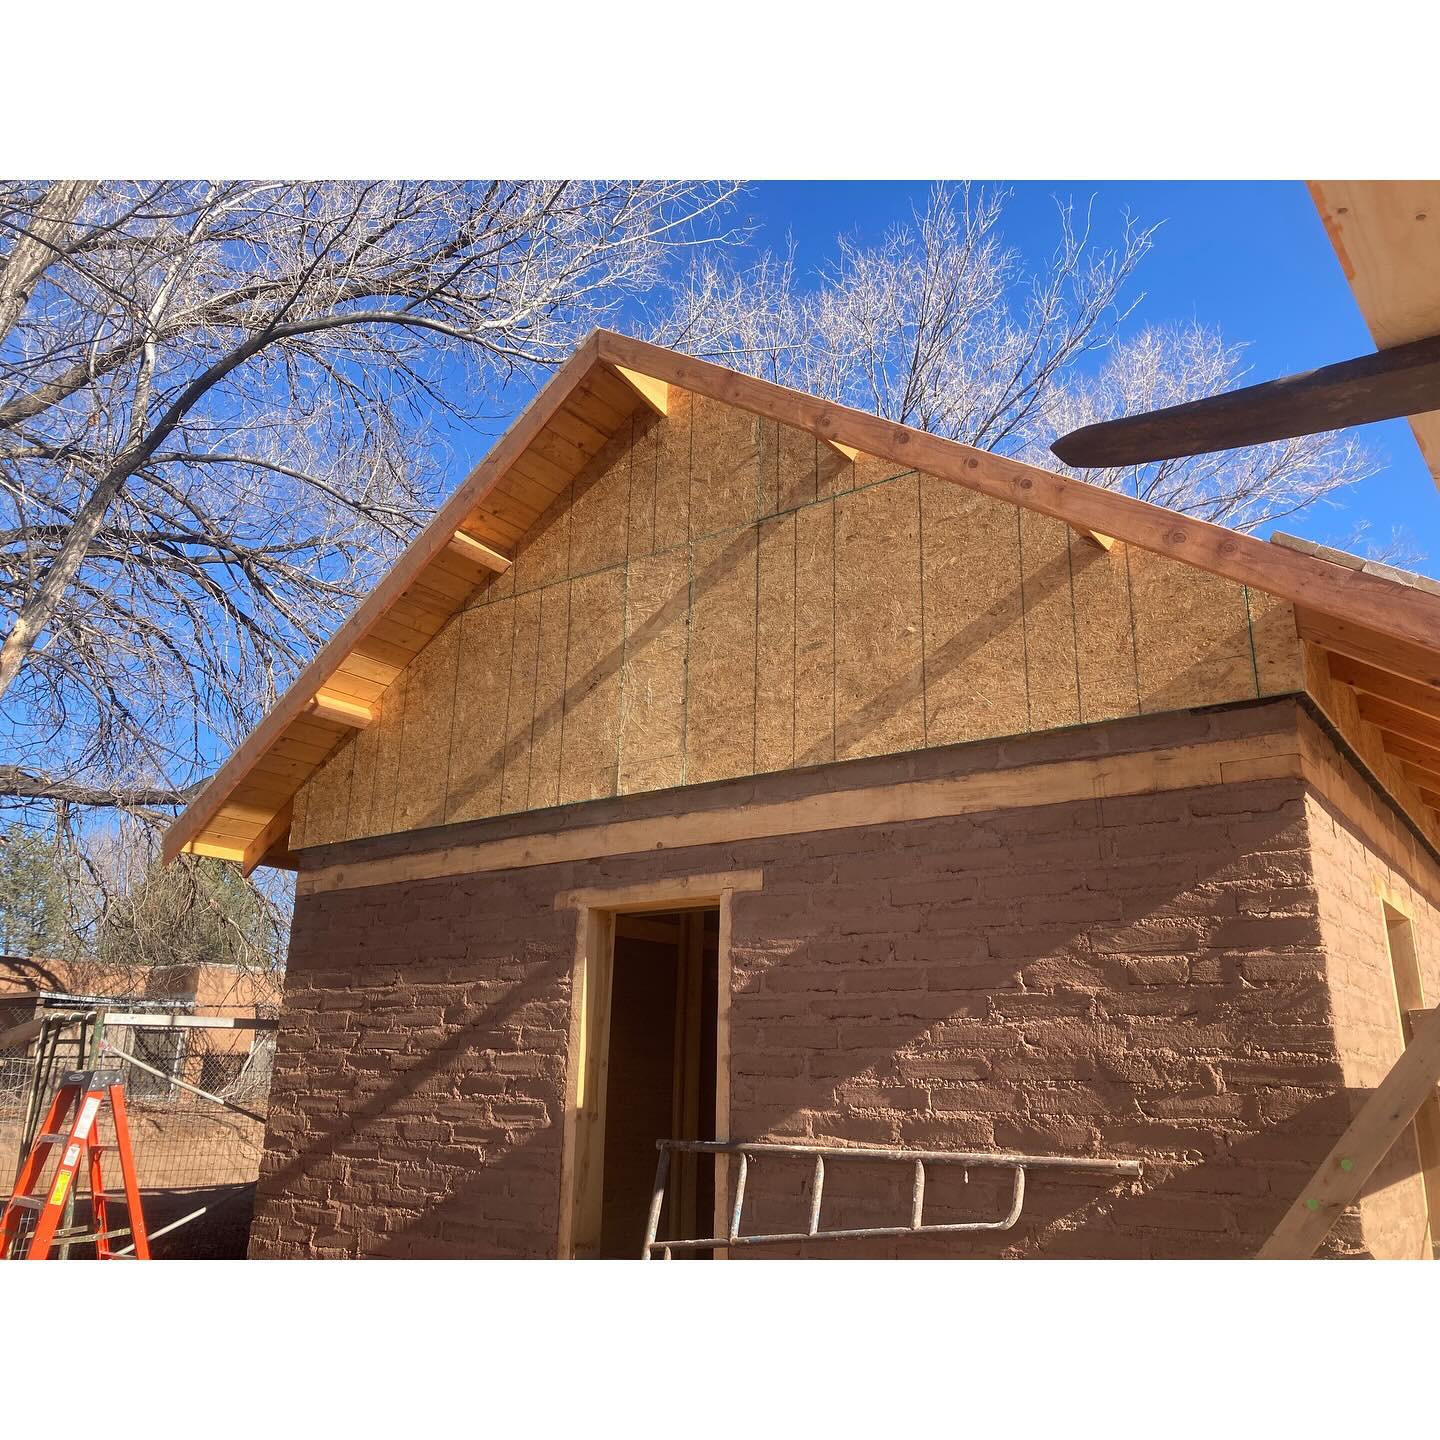
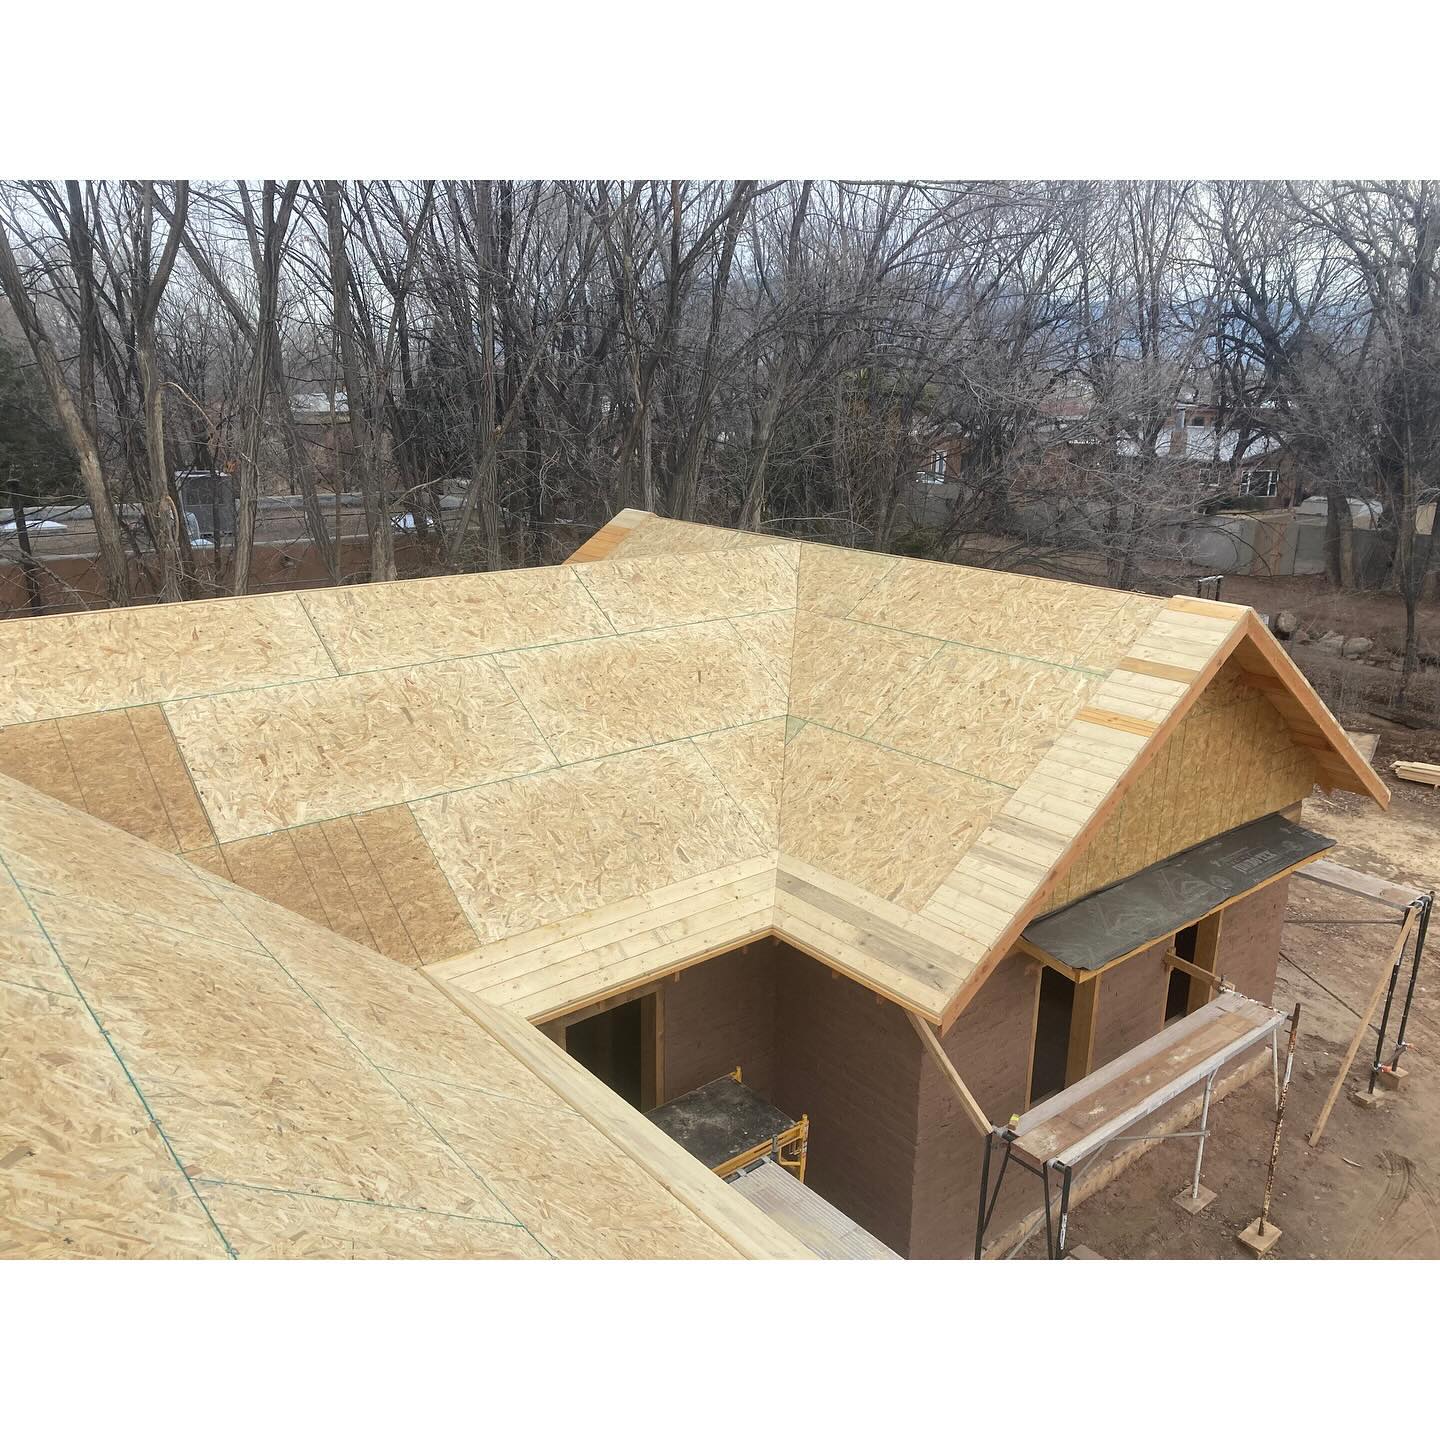
We’ve now completed all of the framing on both buildings. Without a doubt, the bulk of that effort went into the roof structures, as we only have a handful of interior frame walls. We ended up working with two radically different assemblies for the house and the workshop. The house received flat ceilings and an attic, with insulation at the ceiling line. For the workshop, our client requested tall ceilings, so opted to use a unvented, or ‘warm roof’ assembly. The exterior detailing appears the same for both–2×6 Douglas Fir rafter tails, with 2×6 spruce soffit decking. Thanks to the ever-pleasantly-surprising space-time wormhole of a lumberyard that is @raksbuildingsupply, we ended up with an entire unit of 16′ 2x spruce from Germany. Such nice material! Not a twisted one in the bunch. We decided to go with flat ceilings and a vented attic for the house for two main reasons: First, because it was what ‘felt right’ to us. The house has 10′ ceiling heights throughout, and feels spacious without actually being a big house. While designing this house, we had in mind an old adobe in Northern NM that we stayed in years ago. As in the case on many an old adobe, we thought it had been a flat roof house that later had a pitched roof plopped on it, and it had a certain cozy magic about it that we loved. We sought to capture a feeling similar to that house, and ended up recapitulating its evolution as well, as we basically finished building one roof and then built another on top of it. The second reason was the for resiliency of a vented roof. There are very good reasons behind the centuries of building this way: it works. Like, really well. It can get a little bit wet, and it’ll be okay. The same is true for how we build flat roofs, but a pitched roof takes it to another level since you can actually get up in there to make improvements or repairs. The resiliency of the things we build is something I think about a lot. I like to say that we’re not just building for a client–we’re building for their children, too, and who knows how many people after them; and we’d like to leave them with structures that are comfortable and beautiful, but also durable.
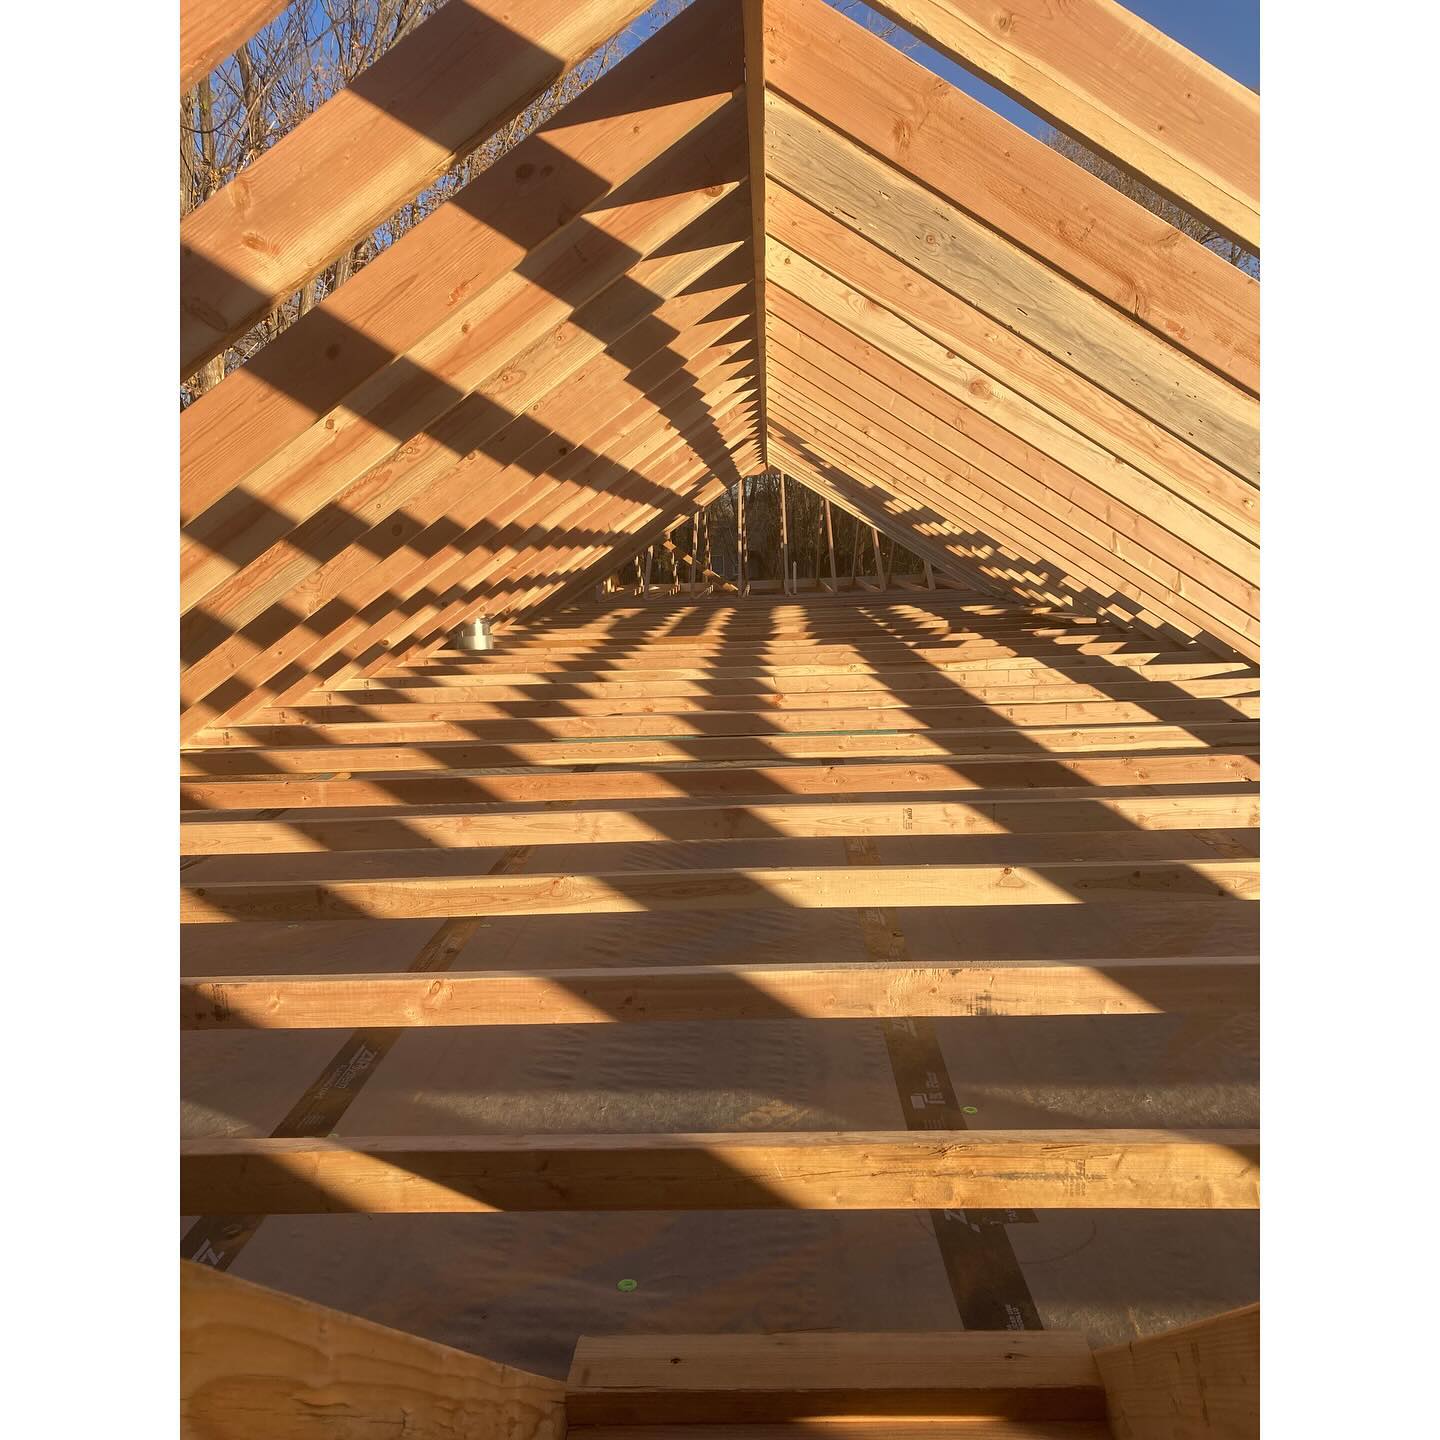
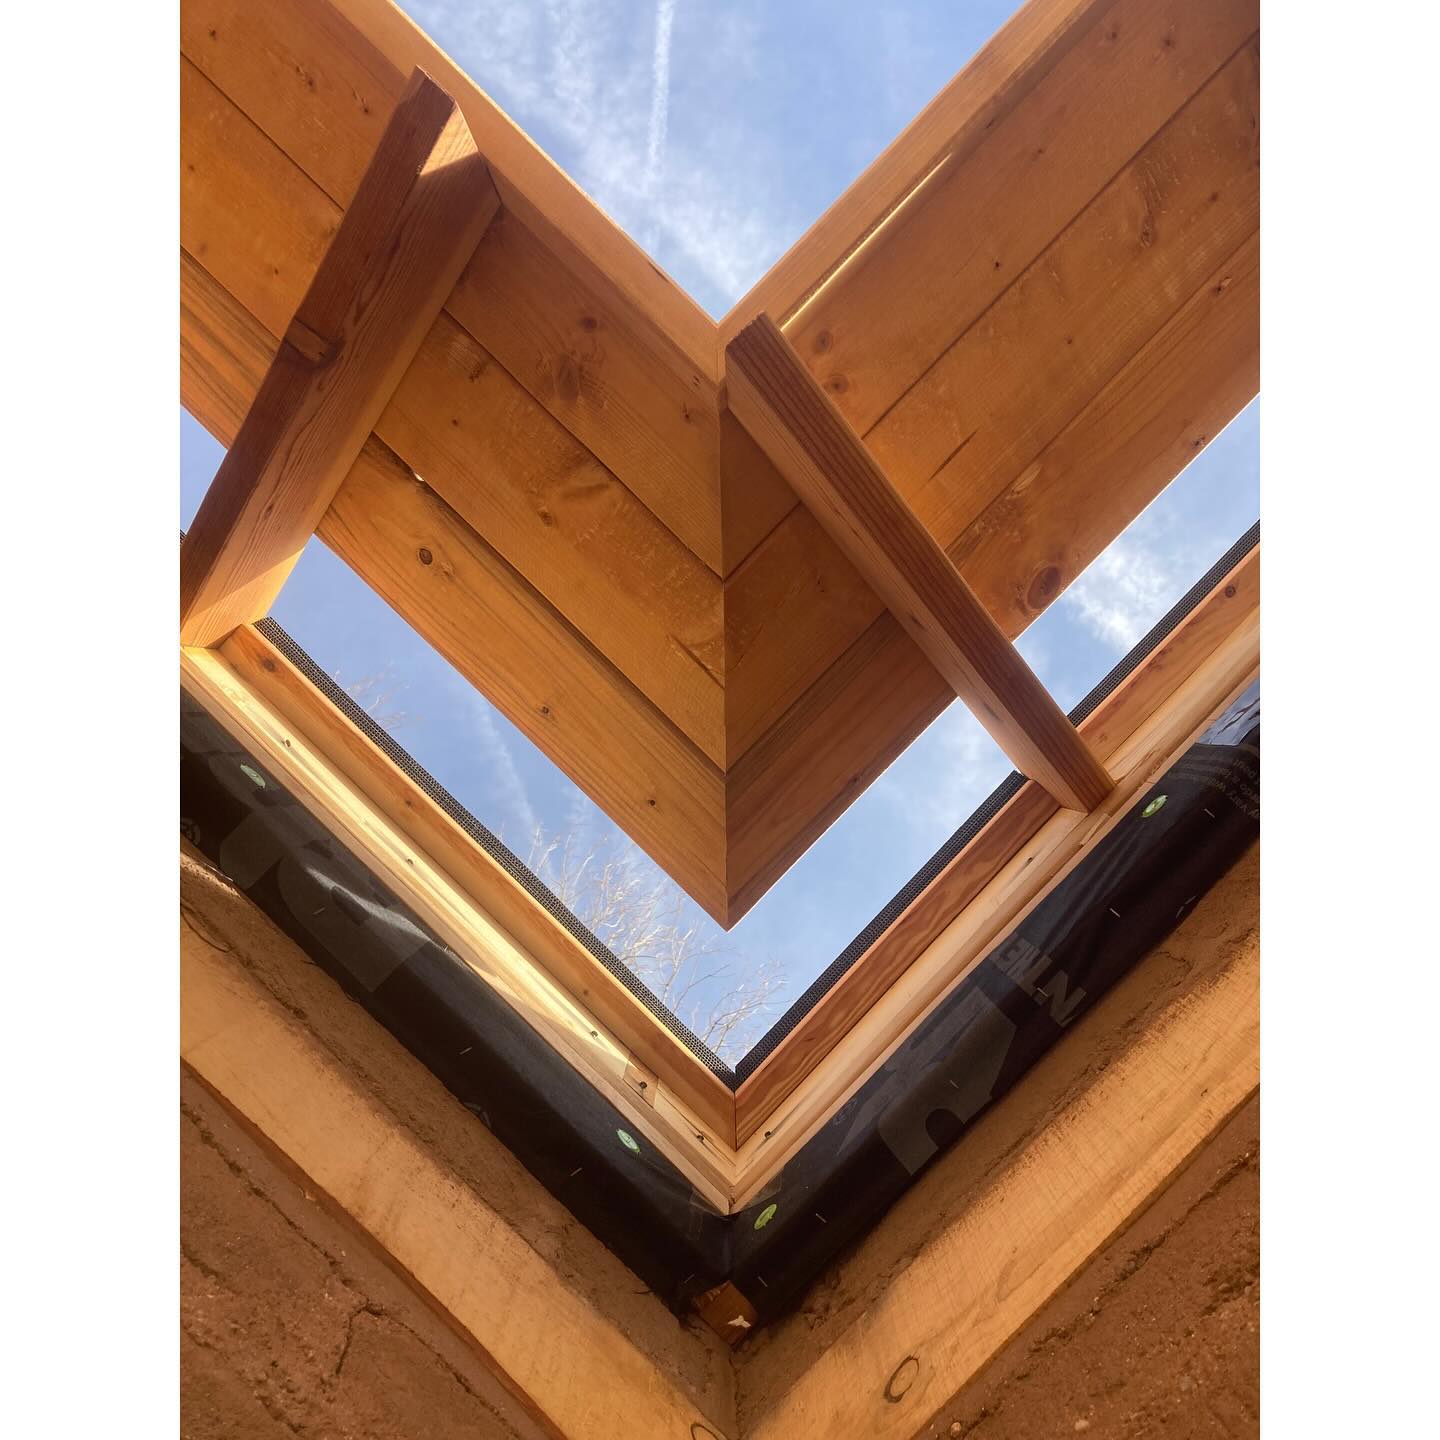
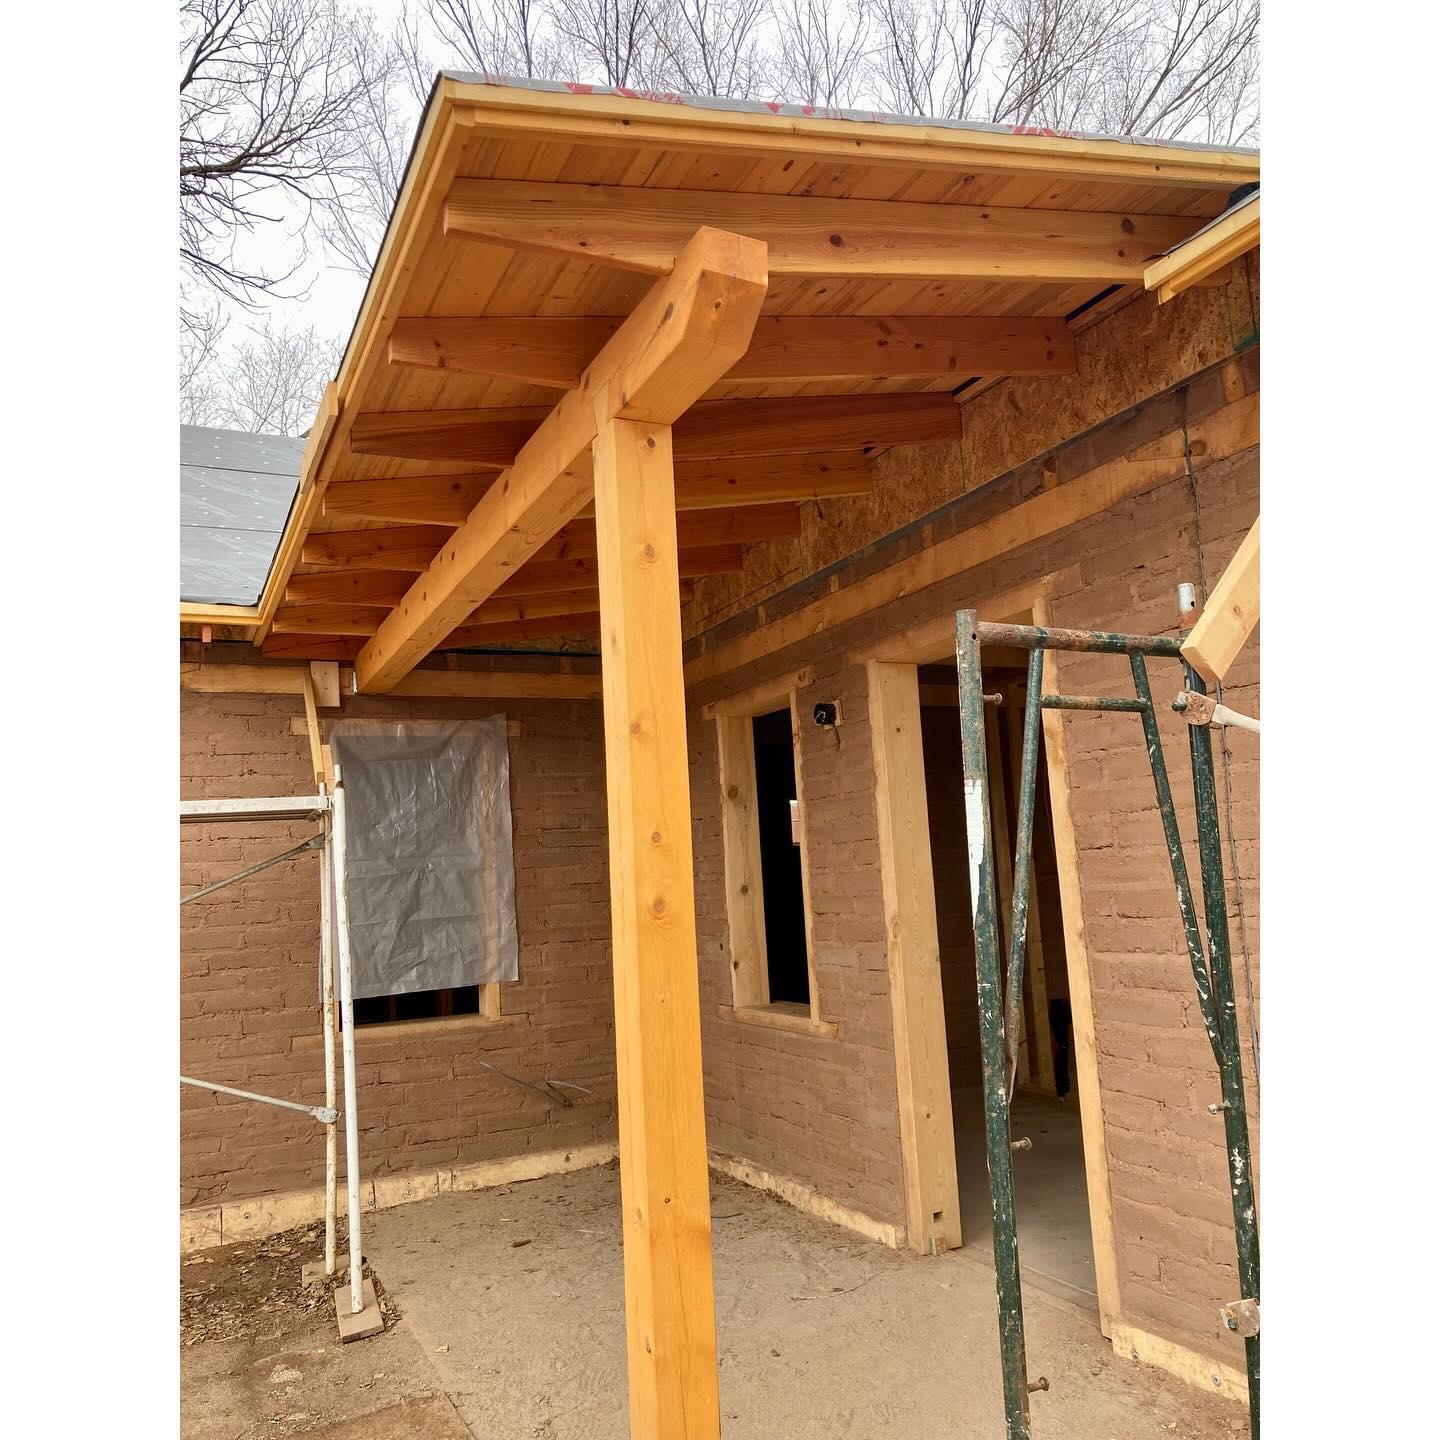
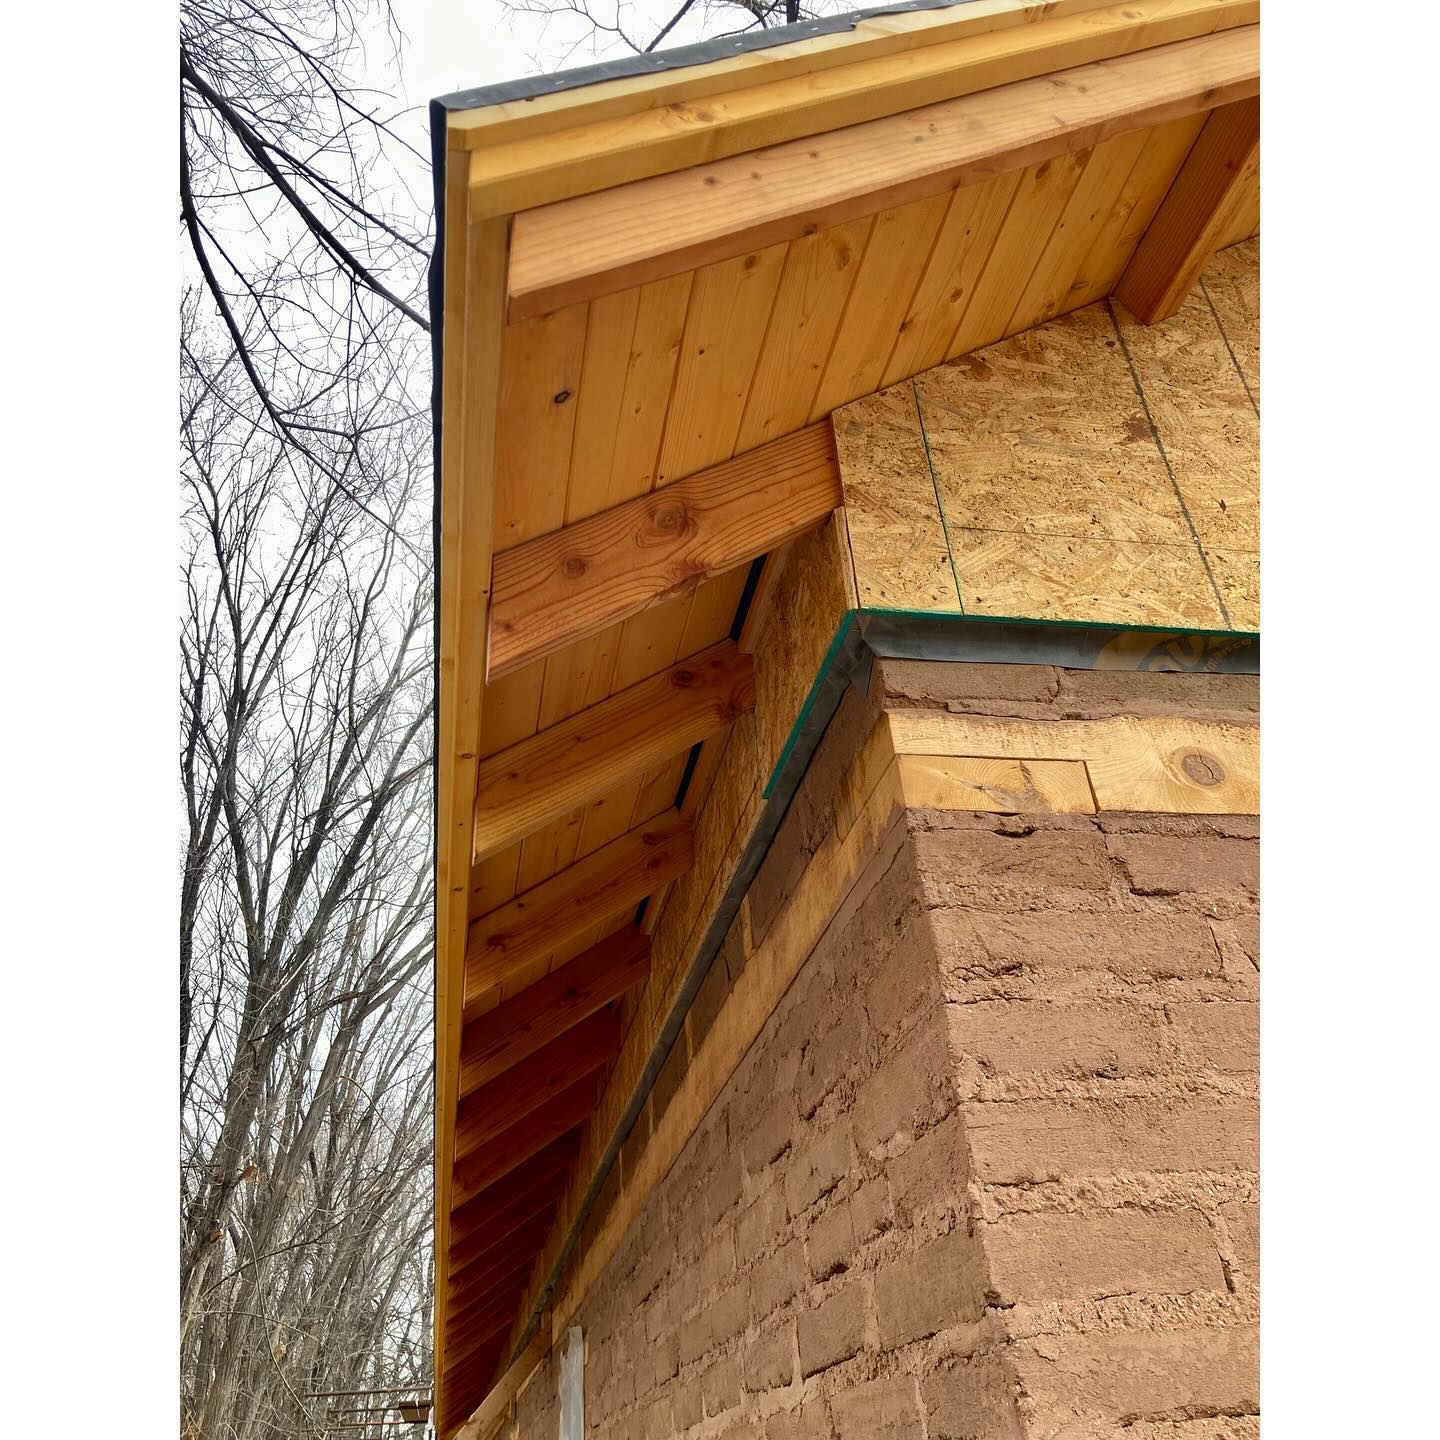
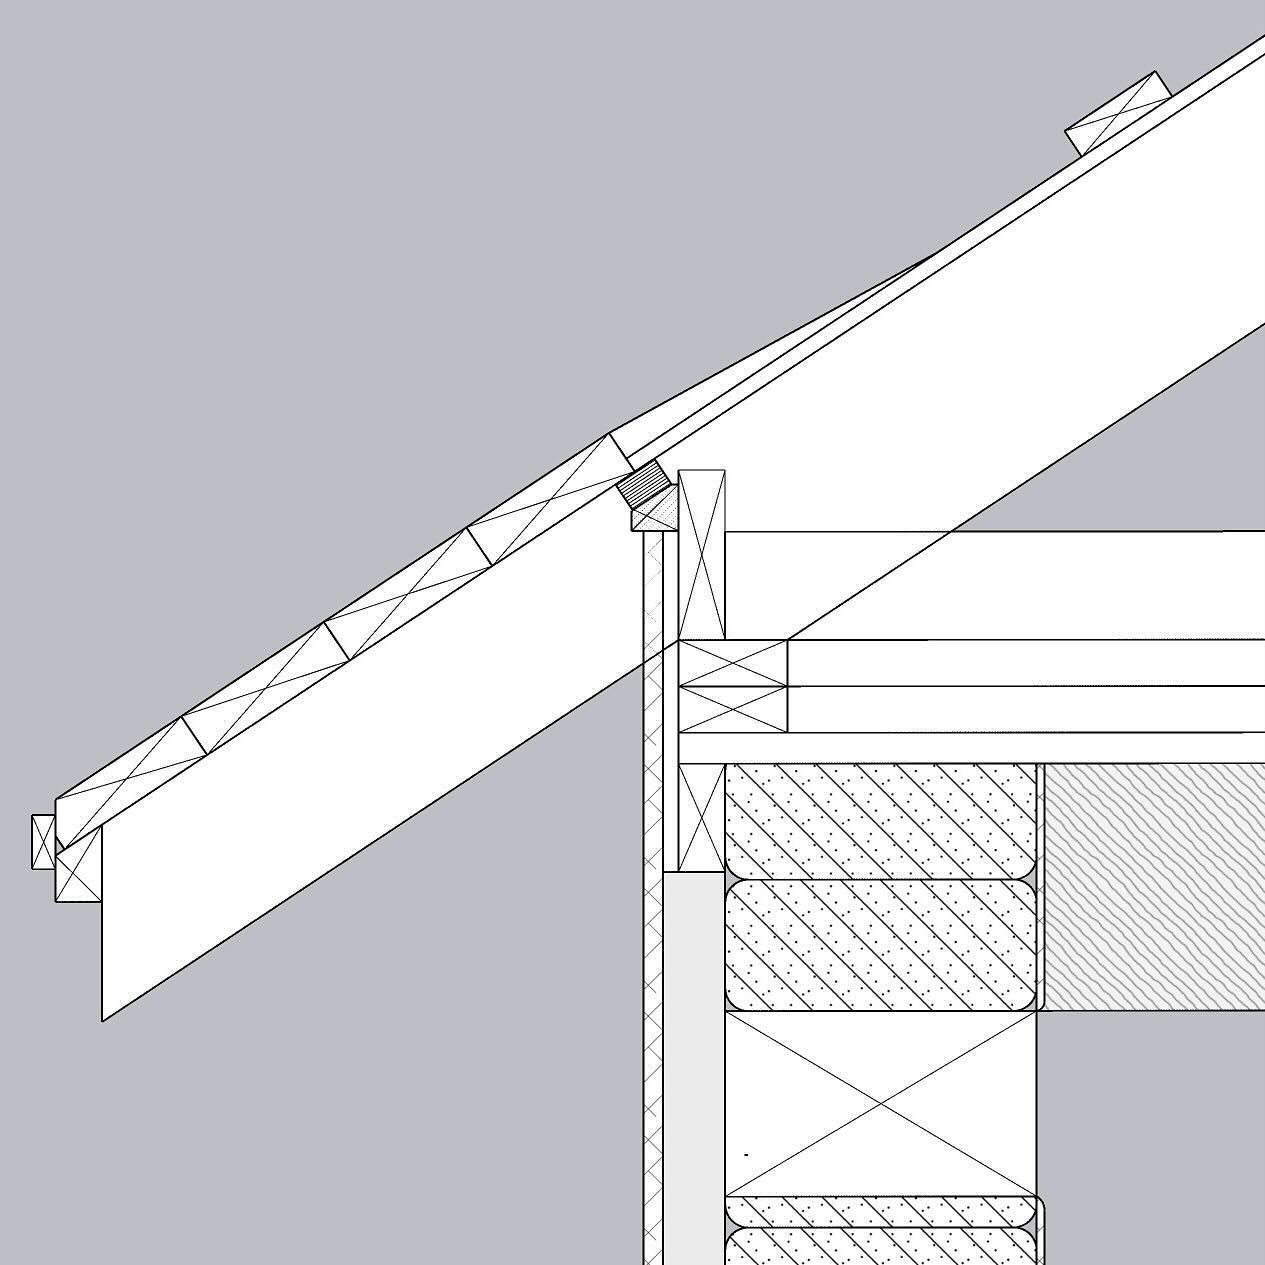
The main roof structure was all framed with Doug Fir 2×8’s, with the tails reduced to 5″ to form the eaves. These sit on a double top plate on the ceiling, which gave us an opportunity to check for square and level all around (believe it or not, sometimes adobes wall move a little bit as you go up!), and each pair got a 2×4 rafter tie to complete the “truss.” This took some extra time, as we had to evaluate each board not just for crown and the usual stuff, but also for which end was free of wain and bad knots. Then, the exposed end had to be dressed with the grinder, and stained, and the edges broken, and only then did they get nailed in place. For venting at the eave, we came up with a pretty cool detail using cor-a-vent at the intersection of the soffit deck and and wall. These were stapled to 2×2’s ripped to the roof pitch, which serve as a way to hold the vent material in place, but also as a nice clean line for the stucco to stop against. They have the appearance of a shadow line, and developed into a more prominent feature than we anticipated–one that we’ve grown quite fond of. We’ll be using metal roofing for this building, which is why we’ve strapped the entire roof deck with 1×4. 7/16 OSB alone is just not enough meat to properly hold a metal roof in place in my opinion, and lugging sheets of 3/4″ up a steep pitch is just torture, so we opted to use strapping instead. With 7/16″ OSB below, this provides a full 1.5″ for the roof screws to bite into, and provides a little venting space between the metal roof and the OSB deck below. It also makes up the difference in height between the top side of the soffit deck and the roof deck, so that it all planes out. #roofframing #finehomebuilding #adobehouse #adobeconstruction #coravent
Jan 31, 2024